The no-code guide to integrating your martech stack
Learn how to integrate your martech stack without coding and connect data across platforms using simple automation tools.
You’ve spent a lot of money on different martech tools. They’re all great in their own way and save you time. But something’s missing. Why can’t you get all your data in one place?
This is a common problem with modern marketing tools. Each platform creates and holds its own data, leaving you with an archipelago of data islands. It’s almost impossible to get the deep insights that would reveal themselves if you could get all the data into one place.
Getting all the data in one place, however, is not easy. But getting platforms to share data isn’t as hard as you think. You can leverage low-cost, easy-to-use tools to bring data together without having to write or understand a single line of code.
Step 1: Turn on integrations
Most marketing tools have built-in integrations. They probably added more integrations since you bought them. Take some time to check out which ones you can turn on.
If you are using a popular tool like Salesforce or HubSpot, you might find that this is all you need: simply ask the other systems to share data with one of these platforms, and you can take the afternoon off.
Sometimes, only part of the data you need is shared through built-in integrations. Before you rush out, take the next step of drawing a data map.
Dig deeper: The sticky problem of martech integration
Step 2: Draw a data map
If you want to know where you are, you need a map. A simple data map will show where all your data is held and the flow of data from one system to another. Below, you can see an example for my firm, Napier.
Step 3: Decide what you want to use
When you’ve drawn a data map, you’ll often realize you duplicated capabilities across different systems.
Sometimes, this makes sense. For example, we use Instantly.ai for our cold outreach emails and SharpSpring to engage prospects. To avoid diluting the high-quality data in SharpSpring with a large amount of unengaged contact data from Instantly.ai, using two separate systems is sensible.
Other times, you just have duplication. For example, we don’t need to use both Google Analytics and SharpSpring for website analytics. SharpSpring gives us the best picture, but we do need Google Analytics to create audiences for retargeting.
Also, you should aim to eliminate spreadsheets, especially if you have a great CRM. Using spreadsheets for reporting and call lists no longer makes sense.
Finally, decide where you want to store your data. Focus on pushing as much data into one system as possible rather than trying to keep all the information everywhere. Typically, this will be your marketing automation platform (MAP). MAPs are great because they are usually highly configurable, so you can add additional fields to store information from other systems.
You really don’t want to try to synchronize data between multiple systems — at least not when you start. Two-way synchronization is difficult, so focus on simply putting all your data into one system with one-way data flows.
Step 4: Work out the connections you need to build
In our data map, there are several places where data is either not shared or is shared manually. One example is WebinarGeek. It’s a great web platform, but it doesn’t have a SharpSpring integration. Uploading CSV files manually is tedious. Wouldn’t it be nice if we could upload webinar registrations automatically to SharpSpring?
It would also be great if anyone who engaged with an Instantly.ai campaign was uploaded to SharpSpring. Again, using CSV files is inefficient.
And, finally, look for opportunities to create new connections. Apollo is a great contact database. Wouldn’t it be cool if we could automatically enrich data in SharpSpring using Apollo?
We’ve identified several places where we could integrate our martech tools. Now, let’s figure out how to do it.
Step 5: Find the APIs
An application programming interface (API) is simply a way for a computer to talk to a system or platform. That’s all it is. To automate, we’ve got to get computers talking together, so we need APIs. Most systems have them. In our examples, SharpSpring, WebinarGeek and Apollo all have APIs.
Unfortunately, Instantly.ai requires an upgraded subscription to access its API. This isn’t unusual. As we’ve got other ways to improve our processes, we’ll put the Instantly.ai to SharpSpring link on our to-do list and focus on gluing other systems together.
Dig deeper: 5 steps to reducing martech bloat through API integration
Step 6: Pick your middleware
Middleware is software that sits between the systems you want to link. It is basically the glue you are looking for.
There are many different products that can be used, and you’ll have to find a balance between cost, features, reliability and ease of use. Since you’ll be maintaining the link and your day job is marketing, I recommend prioritizing reliability and ease of use.
Step 7: Join the martech systems together
This is the exciting bit, where we connect the systems. We’ll examine how you could use two different products: Zapier and Make.
Zapier
Zapier is middleware that runs actions based on triggers. Setting it up is very easy, especially since it integrates with nearly 1,000 martech apps.
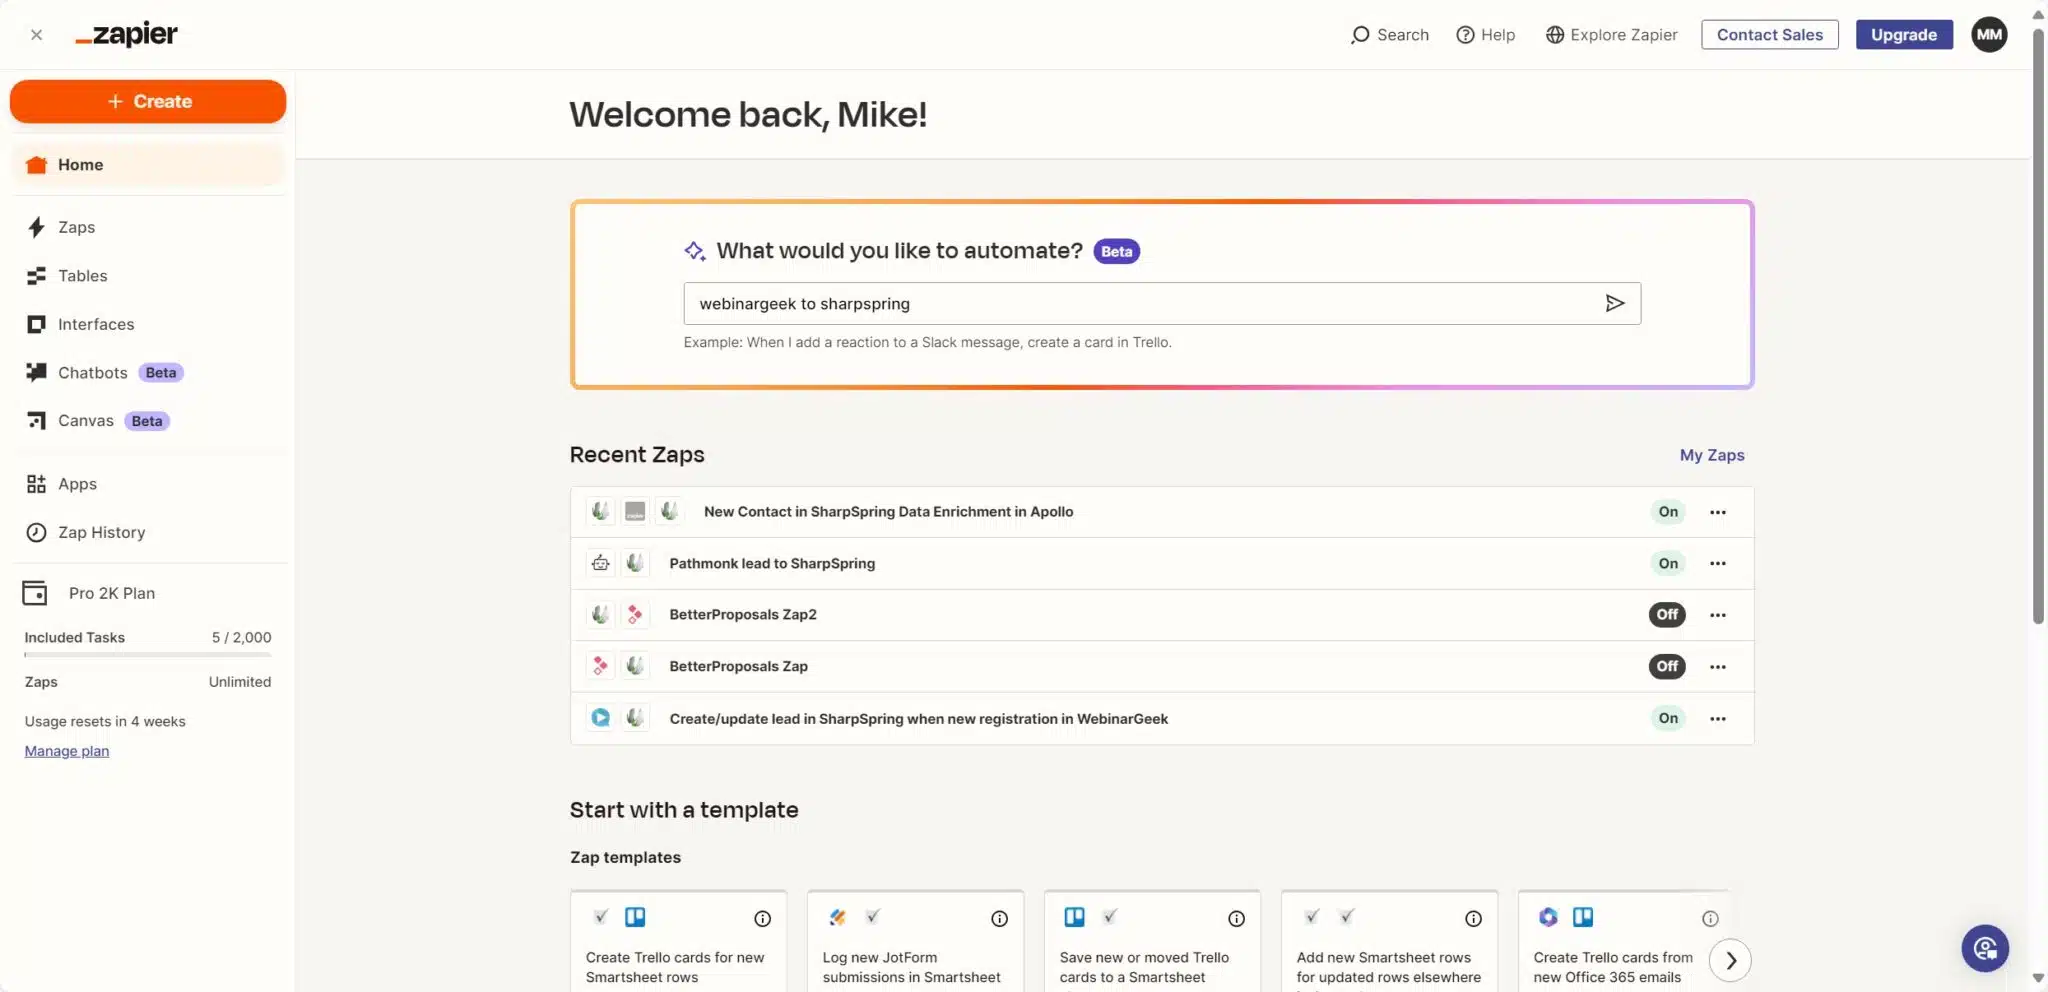
Create an account and log in. You’ll then see that Zapier asks you to describe what you want to automate. In this case, we’re going to get Zapier to create a contact in our CRM (SharpSpring) whenever anyone registers for a webinar on the WebinarGeek platform.

Zapier creates the automation it thinks you want. It’s not perfect, as we’ll see, but it’s normally pretty close.
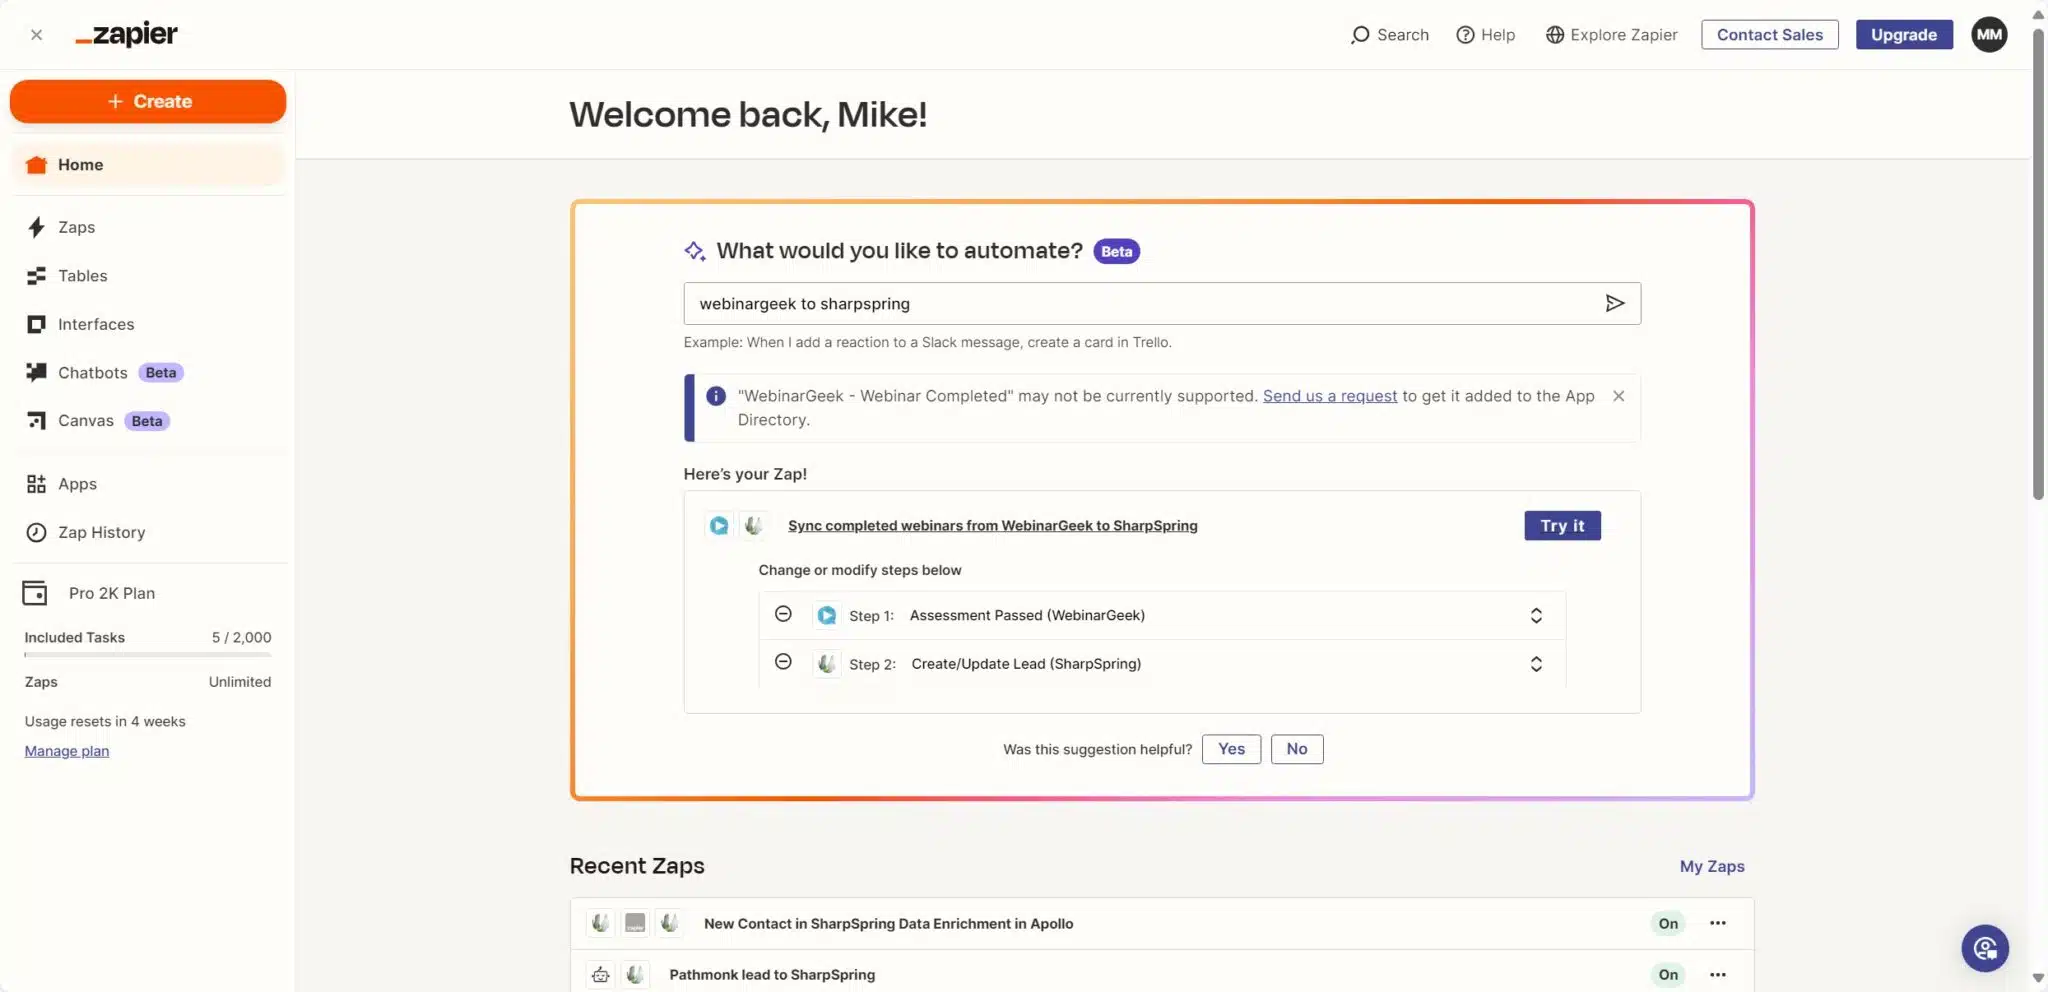
When we click through to try the automation, we’ll see that Zapier thought we wanted to create a contact when someone passes an assessment on WebinarGeek. This isn’t right, but all we need to do is use the dropdown to select a webinar registration as the trigger.
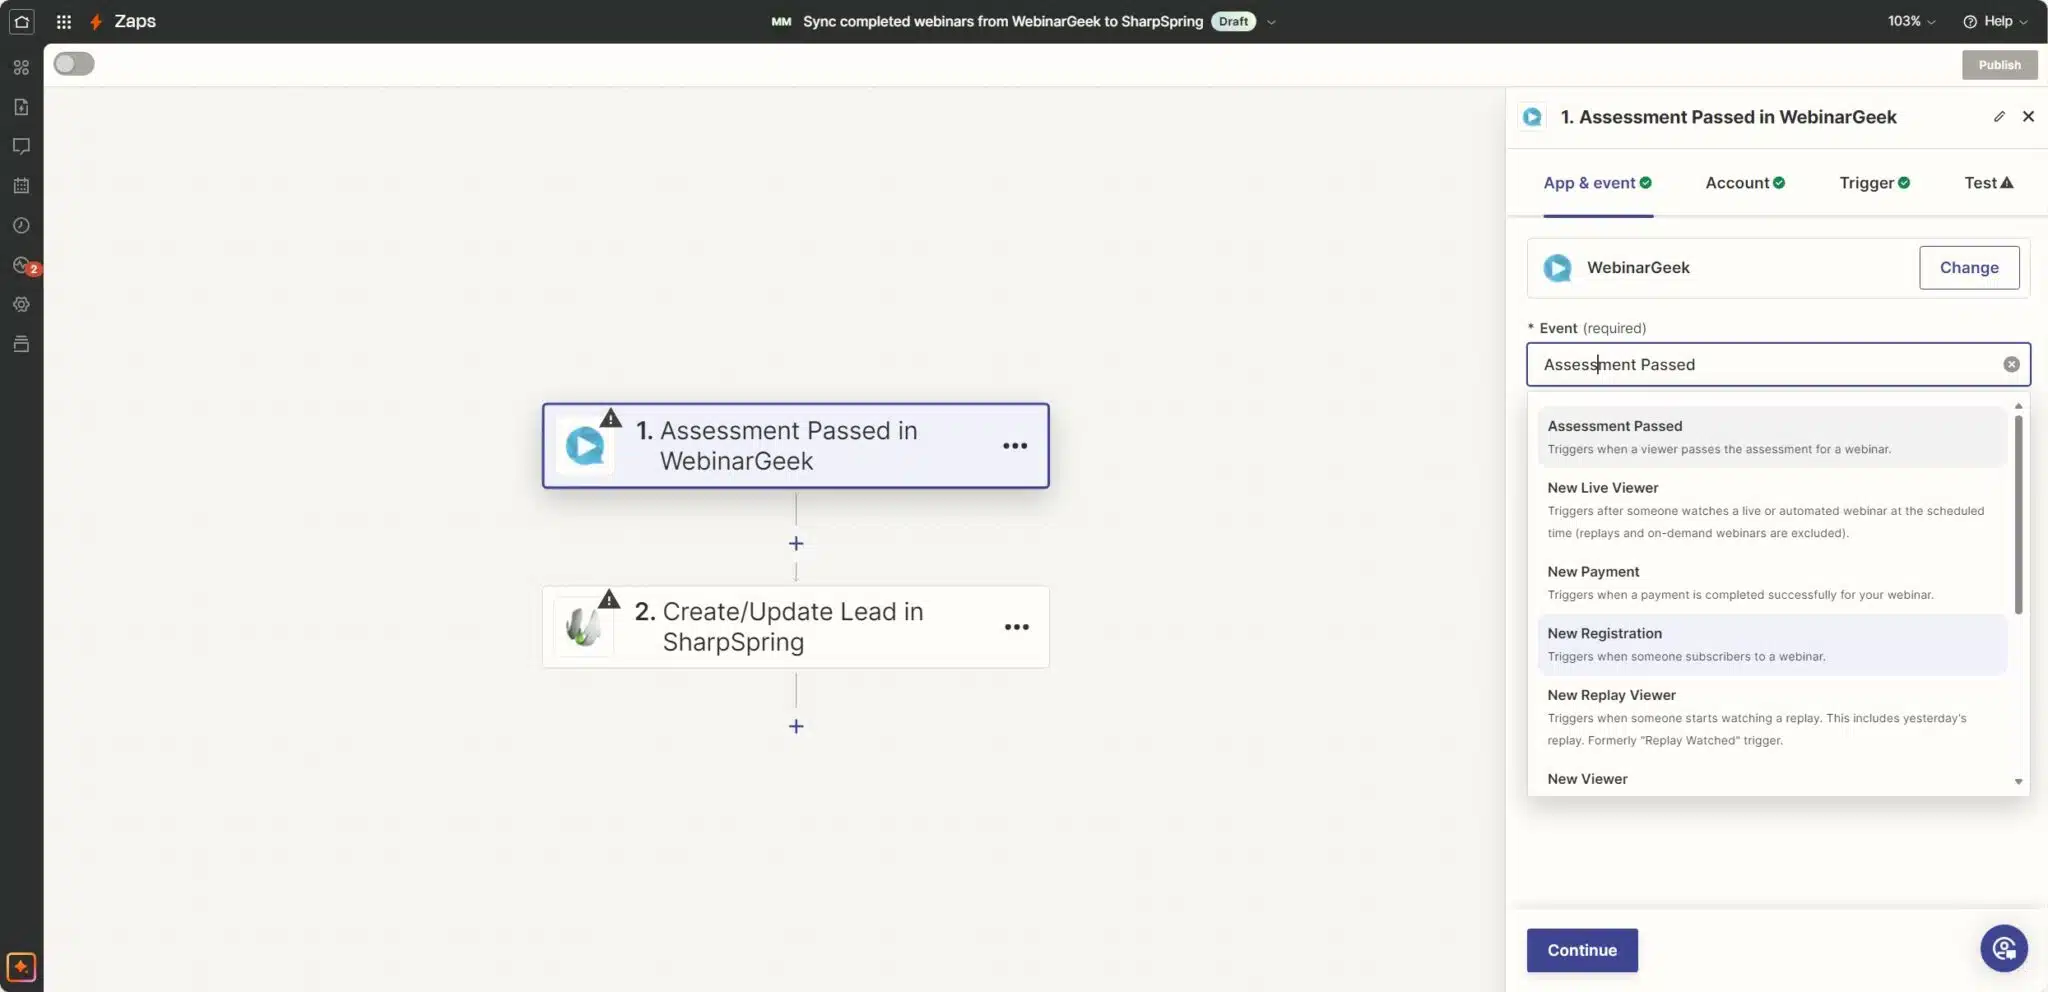
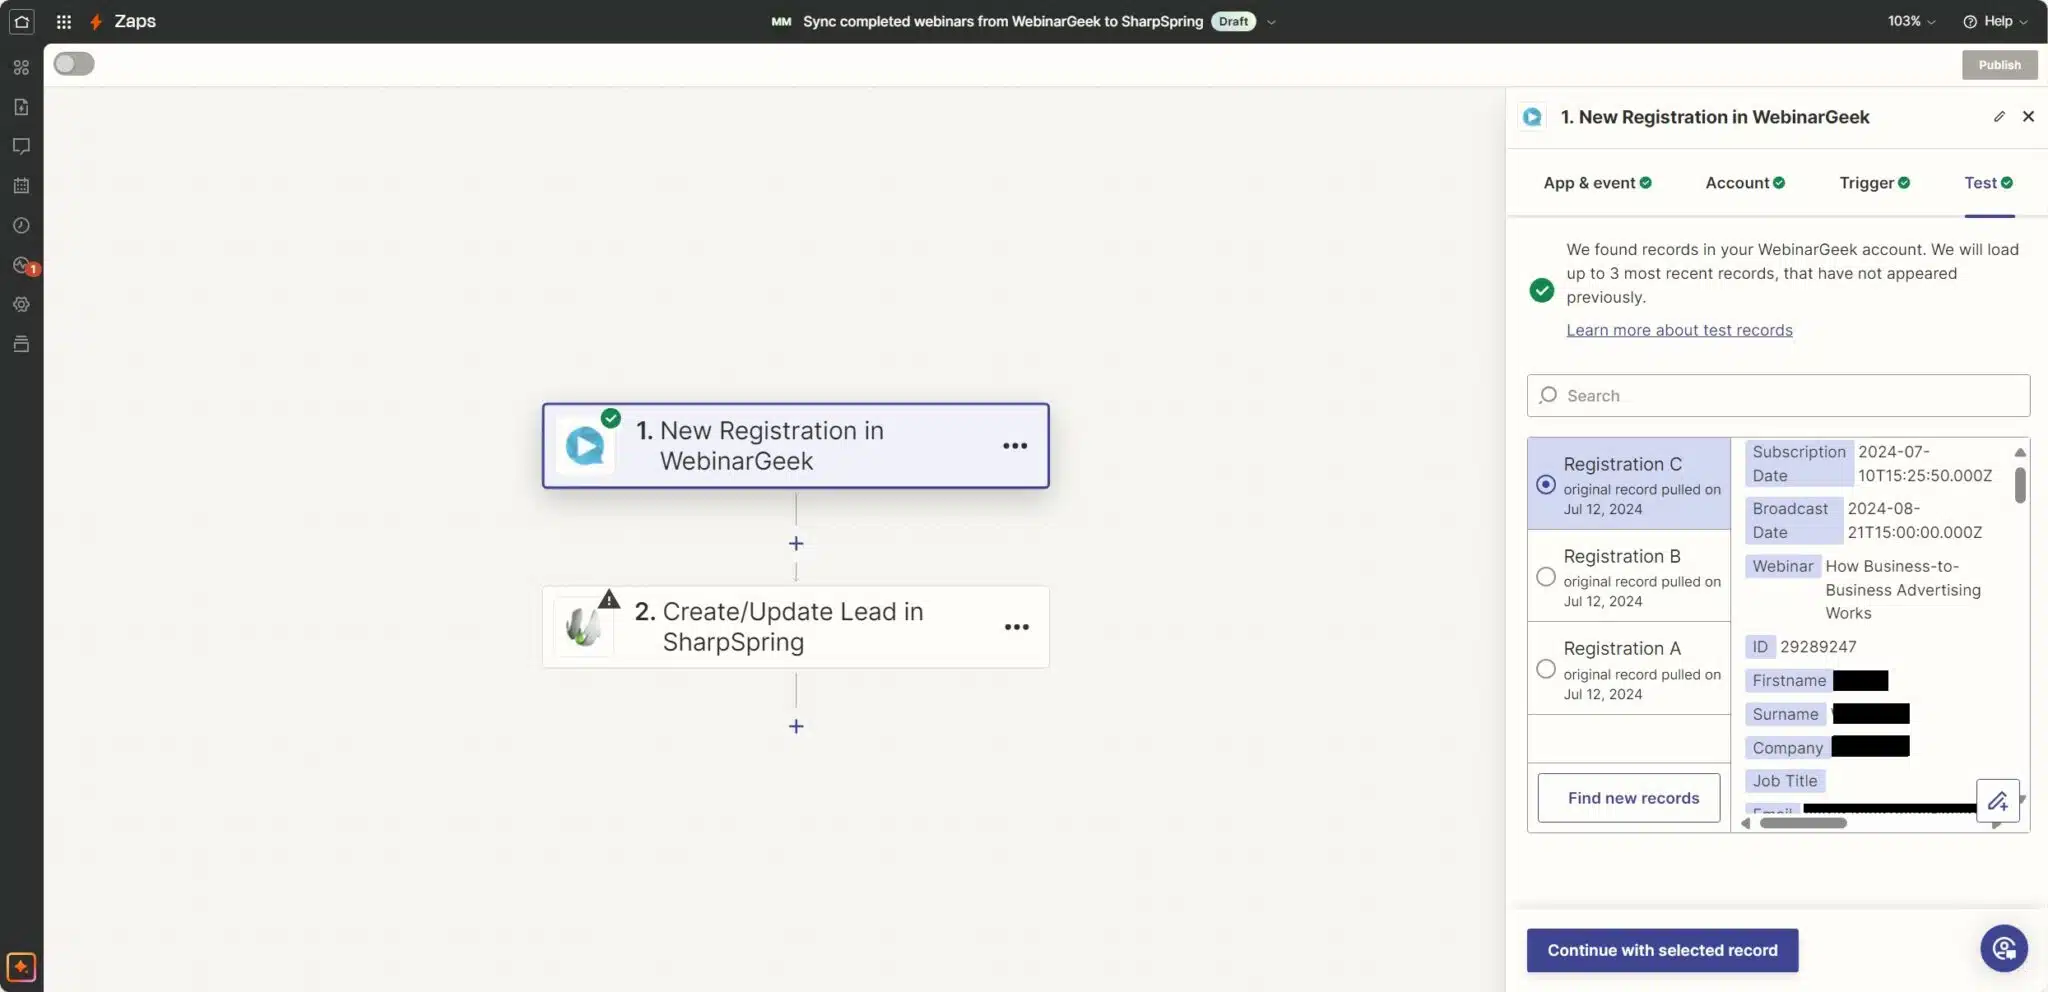
Zapier will then let you click through to see the data that it can retrieve from your system. You’ll see that we have pulled in registration data based on the form we use. We don’t ask for a job title, so this is not populated. You can scroll down and there are many more fields that can be used, including information about the webinar itself.
We then have to tell Zapier which data to put in the available SharpSpring fields. This is simply a matter of clicking the fields and selecting the data from the dropdown. You can also enter data manually. For instance, if you wanted a field to show that the contact was uploaded from WebinarGeek by Zapier.
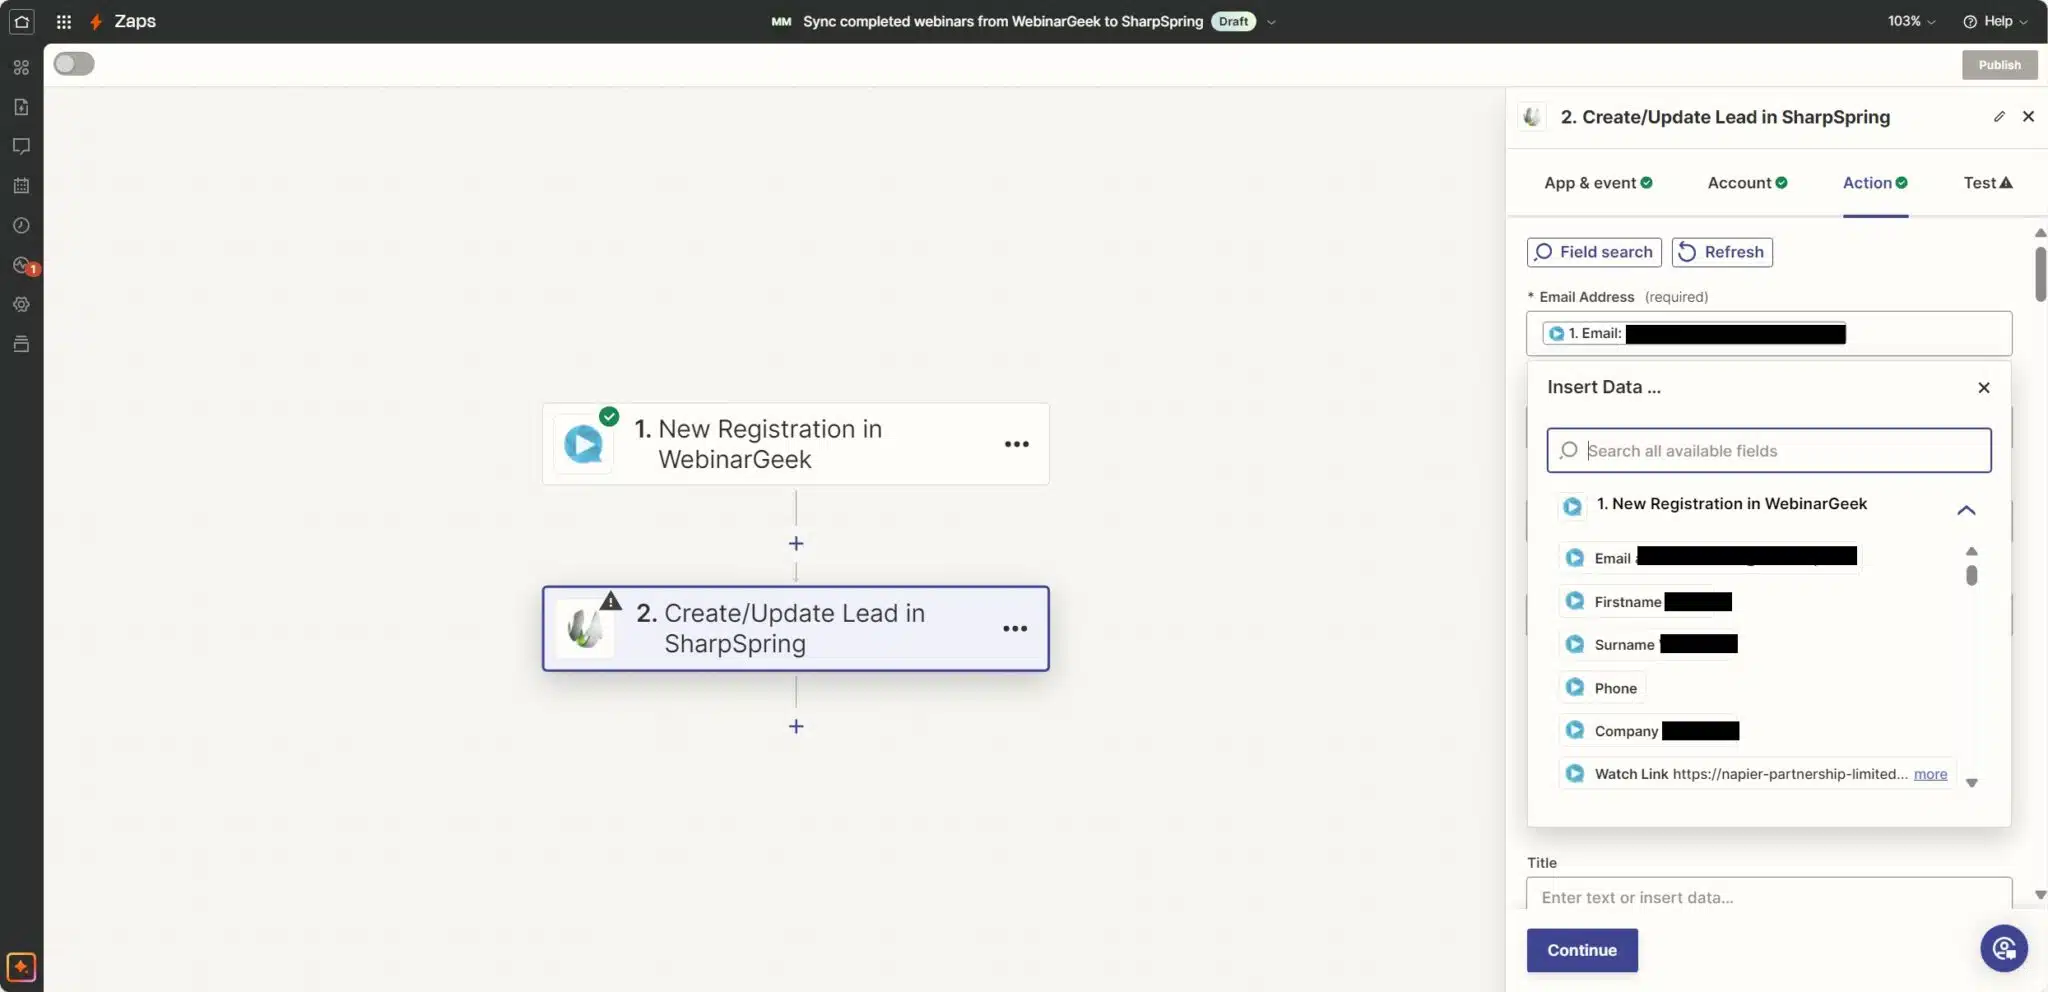
Next, test the automation to ensure the data can be uploaded. In this case, we didn’t get an error, we got a message saying nothing changed. This is simply because we already have the contact in our CRM, and the registration data matches the CRM data. Everything is working perfectly!
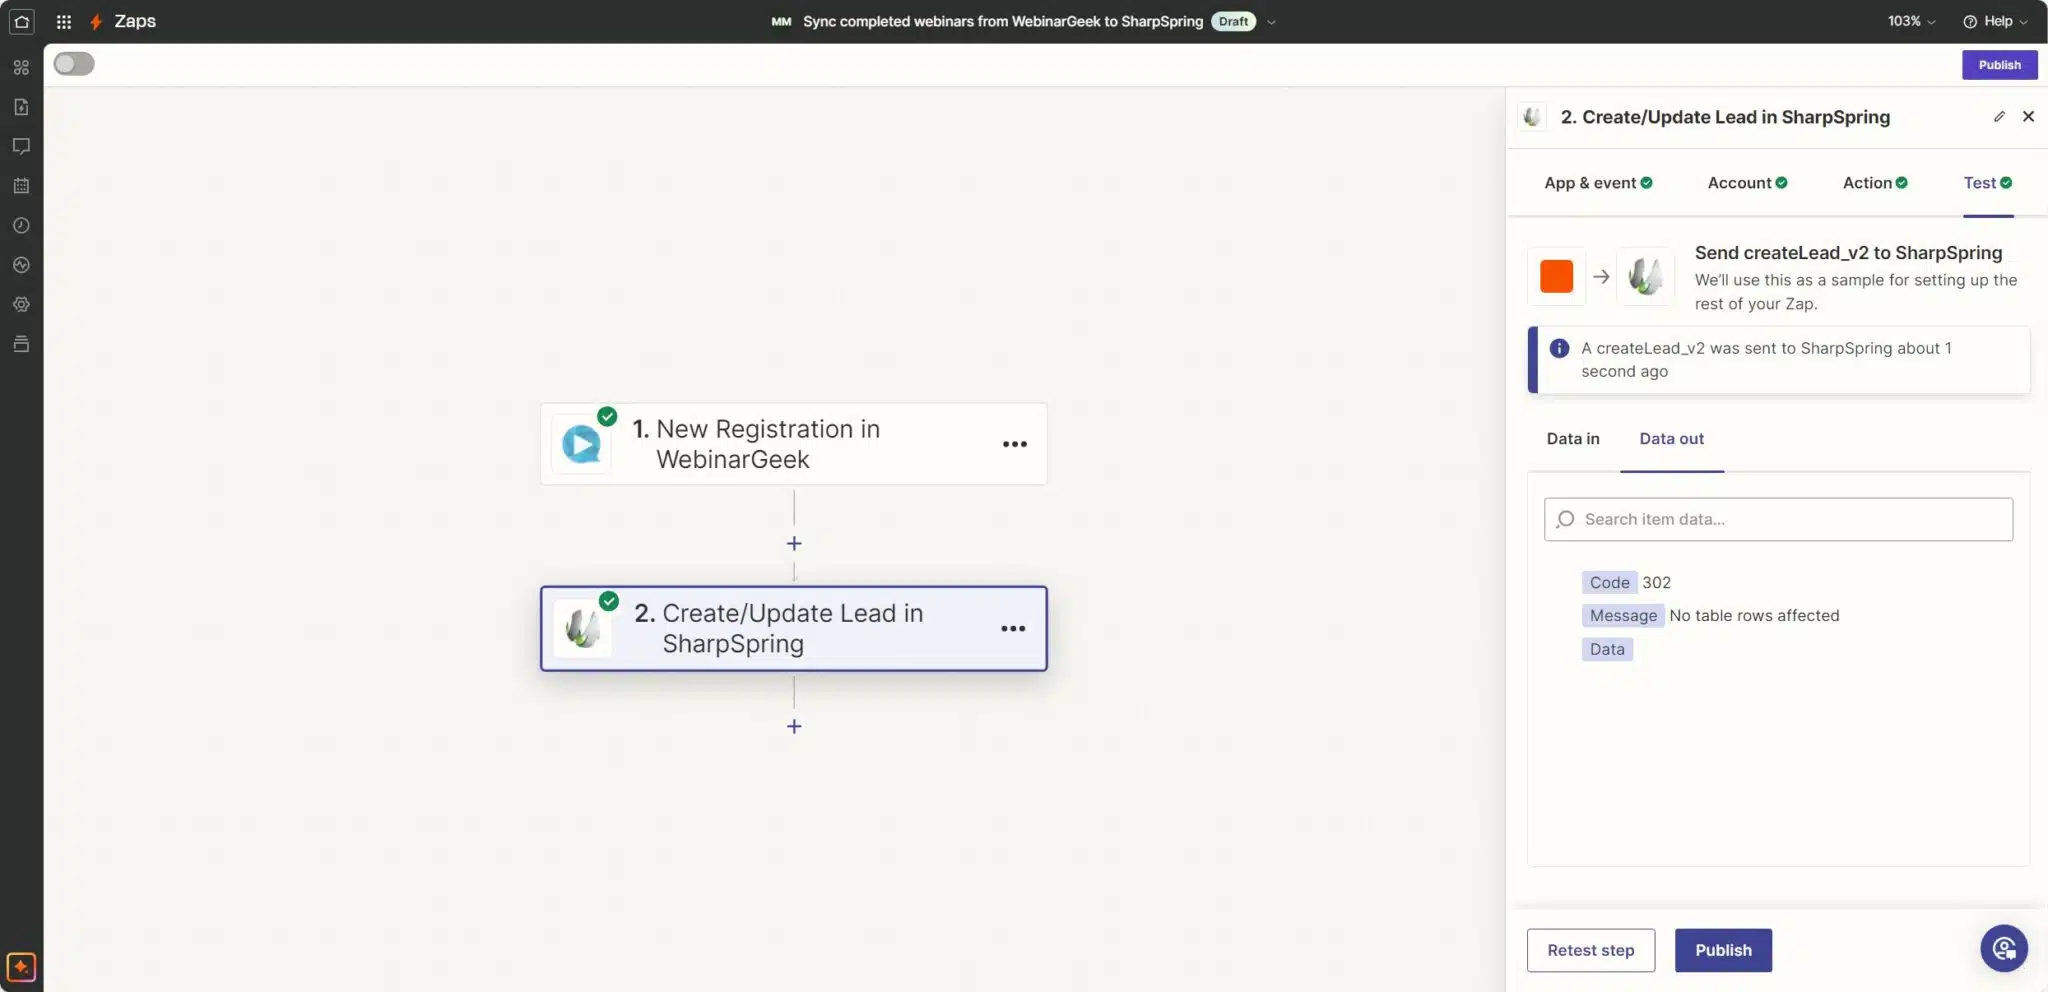
All that is left for you to do is to publish the Zap and it will start working, saving you time.
I mentioned that Zapier is very easy-to-use middleware. It’s normally perfectly good for gluing systems together, but sometimes, you need more complex tools.
Make
Make is a more powerful middleware. Here’s an example where it pulls opportunities from our CRM (SharpSpring) and loads them into a spreadsheet. Yes, I know that I’m encouraging you to integrate things and get away from spreadsheets, but sometimes, even I need to resort to Excel for reporting! In this case, the data from Excel is pulled automatically into our dashboard tool.
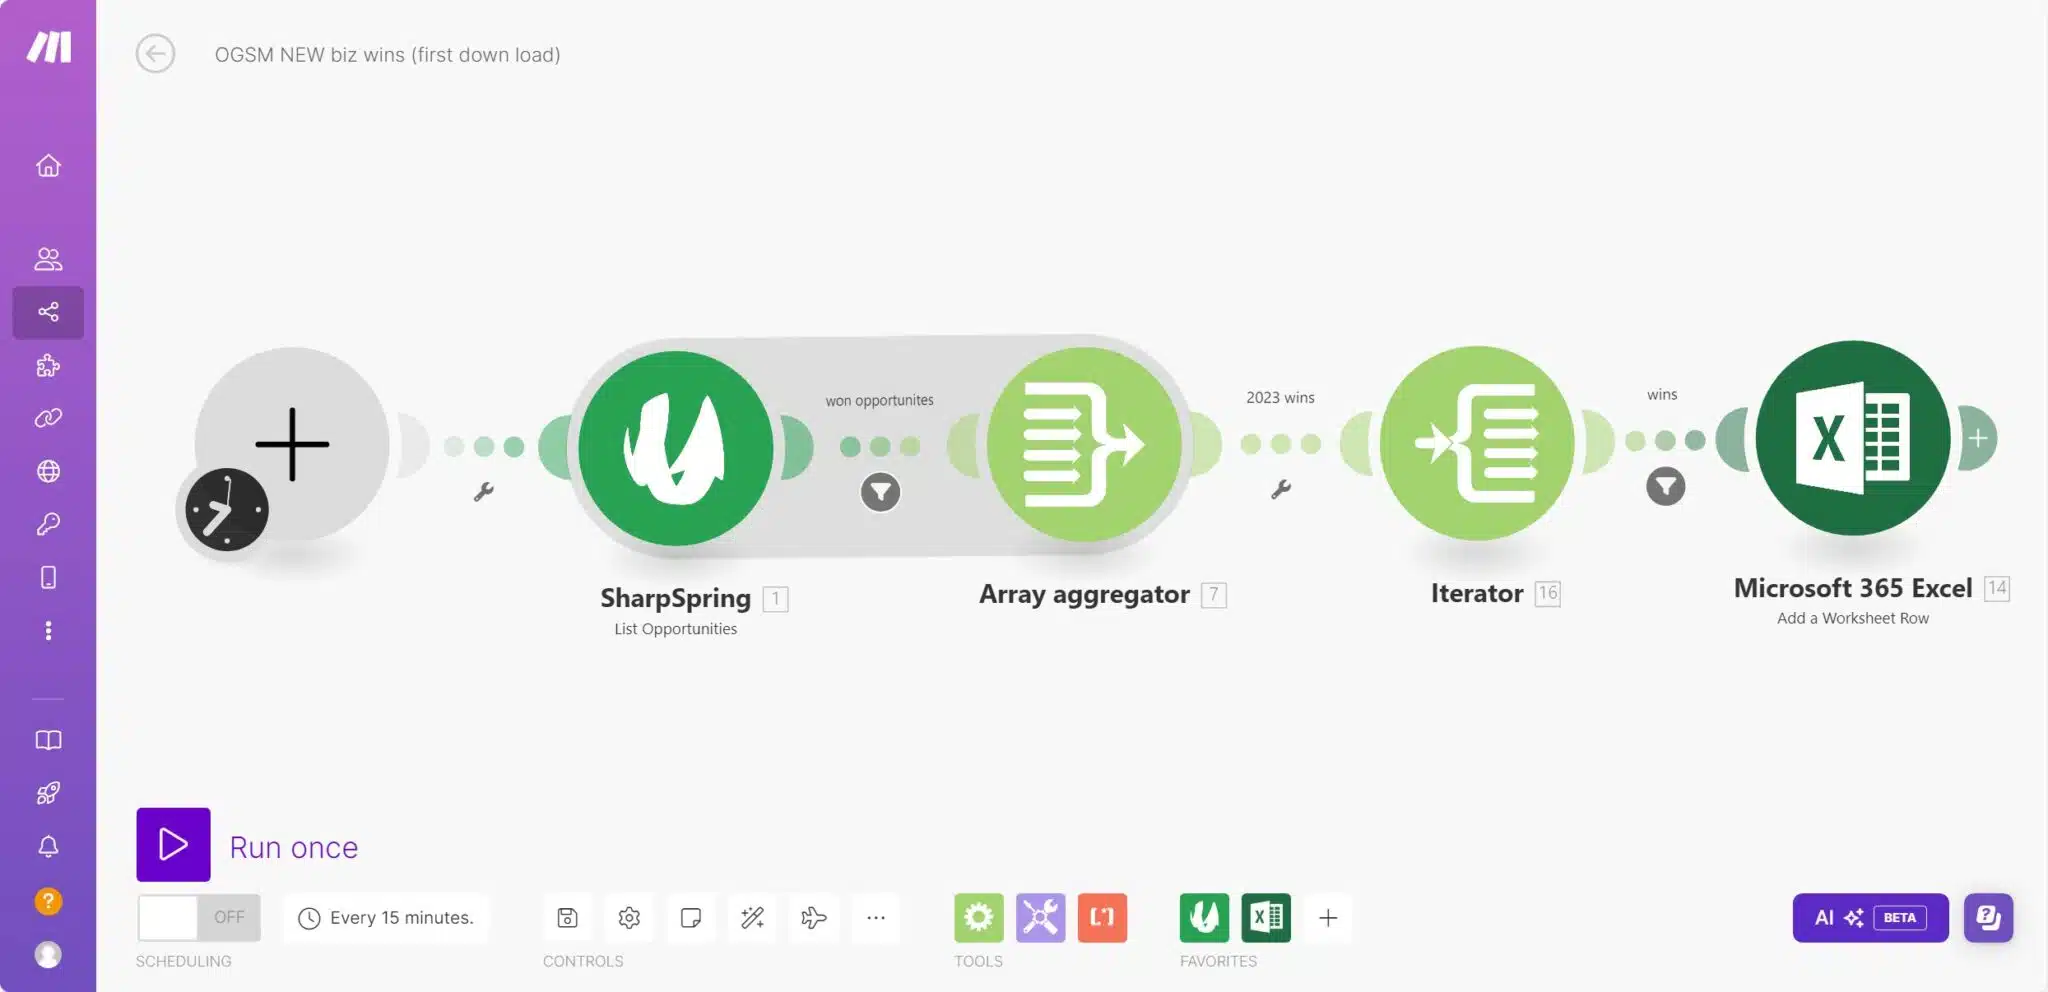
You’ll notice that the flow looks different from Zapier. We’ve got array aggregators and iterators that process the data. Although this means you can do clever things to process data in Make, it also means there’s a significant learning curve. If, however, you’ve always been fascinated by files in JSON format, this is the tool for you!
An important element of Make is that you can automate the running of the tool. You’ll see the first step on the left (the leftmost circle) shows a clock — this means that we automatically run the update on a set timescale.
If we look at the data, Make becomes a little less scary.
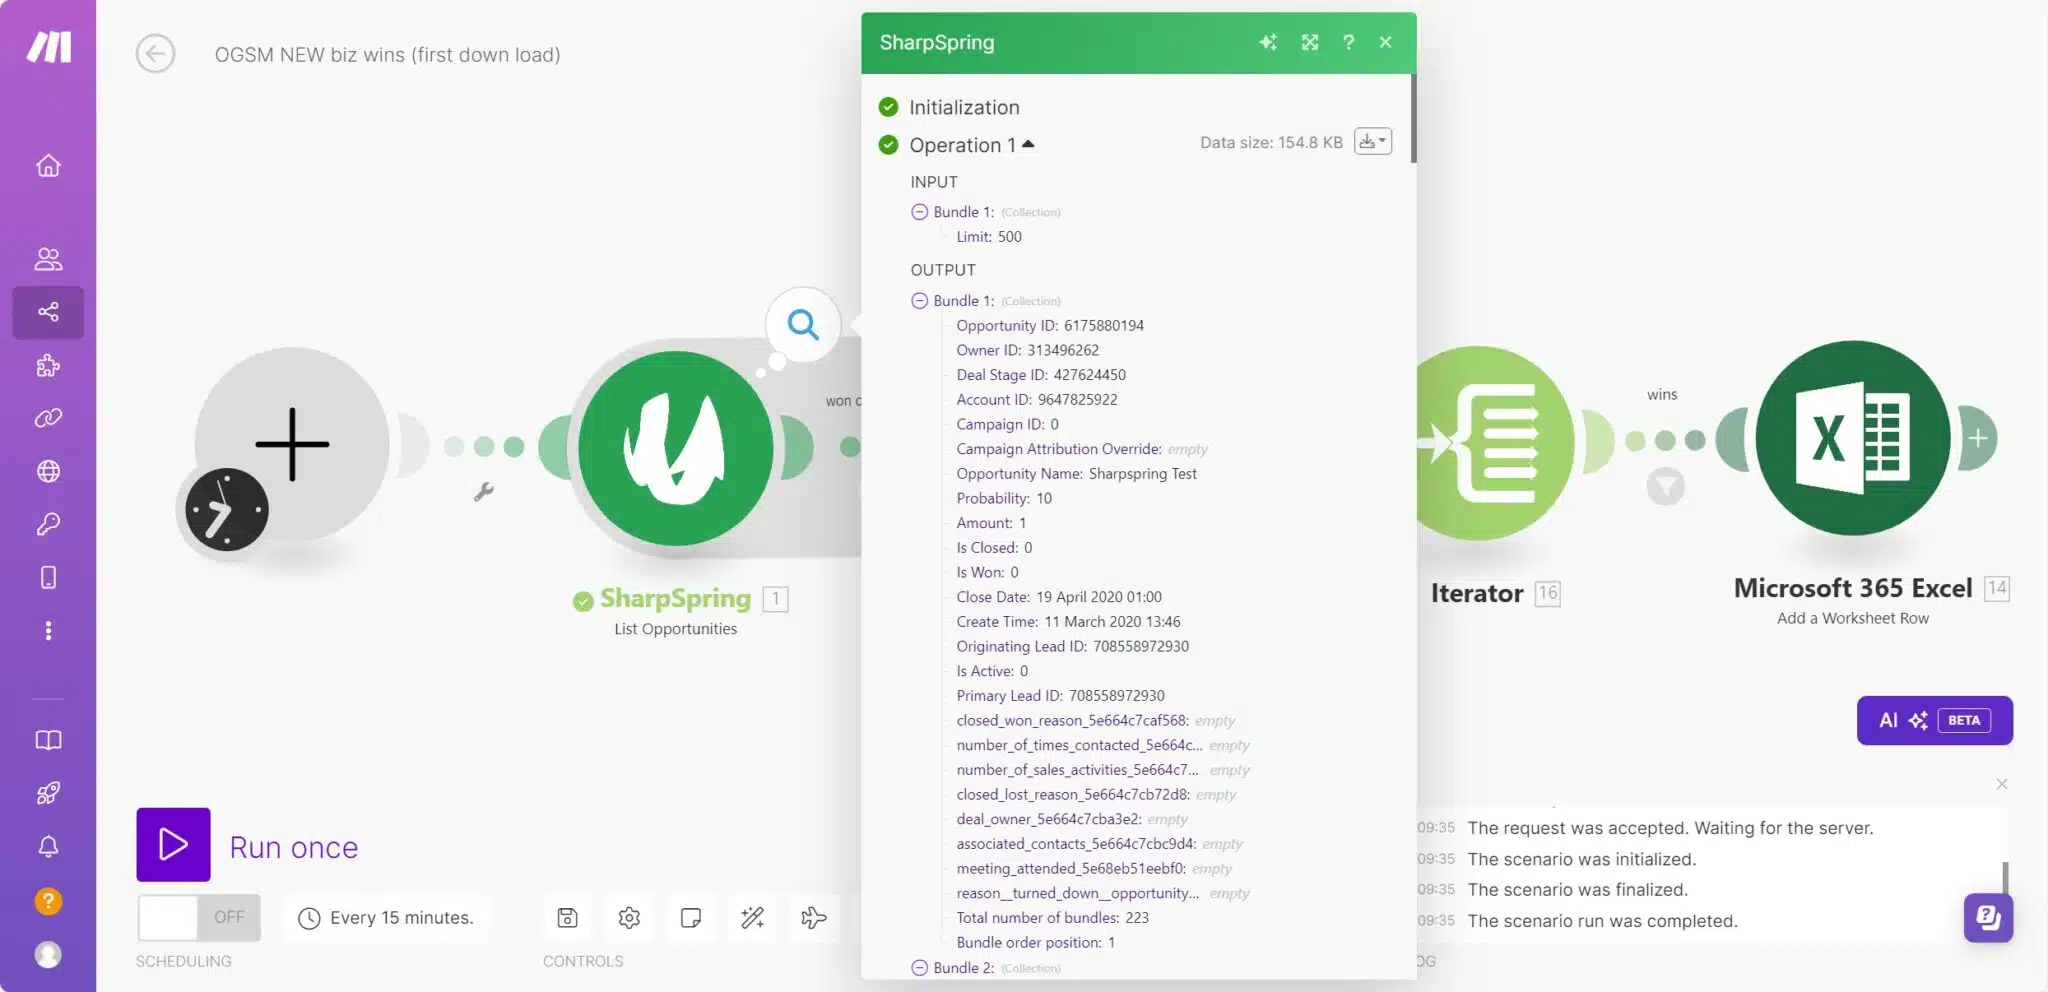
Although the names of the steps are different in Make, and its power means that it’s more complex to use, the underlying process is very similar. I’d strongly recommend you start with Zapier to build your automation expertise and then move to more powerful products like Make. You’ll find the process much easier, and Zapier is ideal to create quick and easy wins.
Step 8: Sit back and let the martech tools talk
You’ve done it, and now you can take a break while the automations simplify your life. As a busy marketer, you’ll still have plenty to do, but you won’t need to manually copy data. This frees you up for more interesting tasks.
Contributing authors are invited to create content for MarTech and are chosen for their expertise and contribution to the martech community. Our contributors work under the oversight of the editorial staff and contributions are checked for quality and relevance to our readers. MarTech is owned by Semrush. Contributor was not asked to make any direct or indirect mentions of Semrush. The opinions they express are their own.
Related stories
New on MarTech